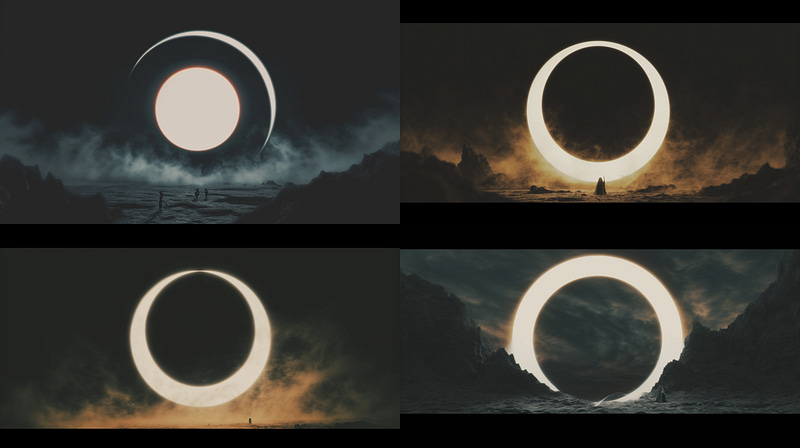
Create Amazing Light Art with Figma and Midjourney
Step-by-Step guide to use Figma as a guide for your prompts in Midjourney to craft beautiful Generative AI images.
Step-by-Step guide to use Figma as a guide for your prompts in Midjourney to craft beautiful Generative AI images.
Midjourney is an awesome new image generator powered by Artificial Intelligence, created by David Holz, and located in San Francisco. Learning to use this AI tool and its AI art generation capabilities is a very potent skill. Whether you’re an aspiring artist or a seasoned designer, this tutorial provides a first step into the realm of AI image generation.
Note: This article assumes the reader knows the basics of Midjourney as an AI Art generator. If you want to learn the basics, please read this guide for beginners.
One often underestimated aspect of Midjourney v6 lies in its capability to incorporate images into your /imagine prompt. This empowers you to significantly shape the fundamental visual framework of a prompt. The impact on your outcome becomes more pronounced with the level of detail present in the added image. Lately, I’ve been employing simple sketches crafted in Figma to exert influence on my Midjourney AI prompts to create amazing AI Art.
And the results have been amazing.
First things first, you can do this with Photoshop, Illustration, Canva, or any other tools you have. Even drawn sketches. But for this tutorial, we’ll be using Figma.
Step 1. Background
To kick things off, let’s craft a frame in Figma mirroring the shape of our intended image. For this instance, we’re opting for the 16:9 format and applying a dark hue, aligning with our vision for the future image to depict a nighttime scene.
Step 2. Shapes
Then, make a shape — it could be a line, circle, square, or anything you like!
In this tutorial, our aim is to create an AI image of a light portal. To achieve this, we’ll craft a shape resembling an irregular circle. You can accomplish this by utilizing two circles and employing the “Subtract” feature, or simply by generating a circle in one color and overlaying another with the same color as your background.
Step 3. Effects
Let’s add a cool glow effect. Add layer blurs to the shape. You can duplicate the shape a few times and use blurs with different values to make it look 3D. Once you’re happy with how it looks, export the image as a PNG and bring it to the Discord of Midjourney.
Step 4. Prompting
Now, let’s start building the prompt in Midjourney. Go to the Midjourney Discord Server and start by adding the image link. Midjourney AI facilitates the inclusion of images in prompts through URL pasting. Next, articulate the desired light behavior within the picture. Feel free to design the remainder of the prompt according to your preferences. In this illustration, we’ll employ the subsequent prompt as our example:
Cinematic Medium Shot, mysterious human, circular portal in an alien wasteland leading towards a nebula, in the style of biblical drama, monumental figures, voluminous mass — ar 16:9 — iw 0.5 — v 6
What is — ar? It’s the parameter for Aspect Ratio. Will define the dimensions of our AI generated Art.
What is — v 6? The version we will be using. In this case, our AI creation will be made in Midjourney v6
What is — iw? It’s the image weight parameter — iw. It’s used to adjust the importance of the image vs. text portion of a prompt. The default value is used when no — iw is specified. Let’s try playing with three different values (0.9, 0.5 and 0.9) and see what results the Midjourney bot gives us:
Weight of 0.9 is very heavy in our generated image. Let’s reduce it a bit.
Weight 0.5 is better. Maybe if we push it a little bit more?
Weight 0.1 is so much better.
That’s it! You’re done!
You can use the same technique to experiment with different shapes, colors of light, and combine them with various prompts to try to get different AI images.
I hope this tutorial has been helpful and has given you a new set of tools to explore. As mentioned before, there are many creative tools out there for creating these light shapes (Canva, for example) and use an AI image generator (Adobe Firefly and DALL-E are great), but Figma is my favorite, and the best part is, it’s free for anyone to use!
Thanks for reading!
Hi👋 I’m Erik, a product designer by day, and AI educator by night.
I‘m sharing my learnings in this newsletter.
It would be amazing if you could join me on this journey.


