How to draw motion in videos: Kling’s new Motion Brush feature explained
Direct the movement of your images with Kling’s new Motion Brush
Kling has rolled out an amazing update to its video generation toolkit, introducing new features that elevate the creative experience for users.
Among the key highlights is the release of Kling version 1.5, which boasts full 1080p HD resolution, offering crisper visuals and smoother, more natural motion.
Yeah, Kling looks really good.
But perhaps the most exciting development is a new feature introduced in version 1.0 that sets Kling apart from its competitors: the Motion Brush.
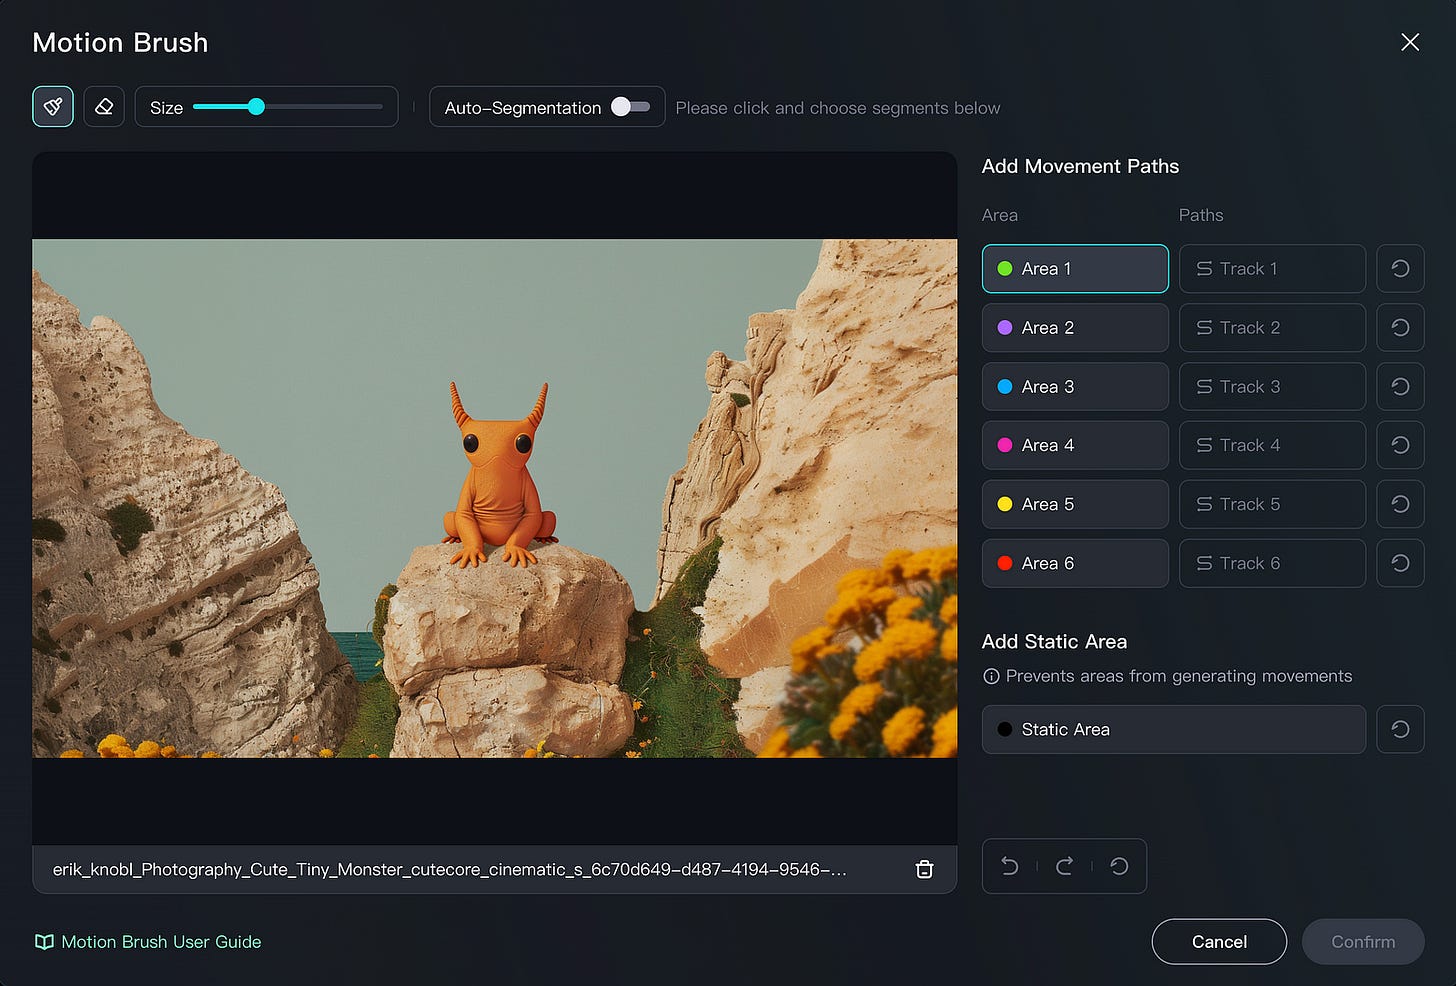
This tool allows users to guide the movement of up to six elements when generating videos from images.
While other platforms like Runway’s Gen-2 offer motion control features, Kling’s Motion Brush adds a hands-on twist: users can physically draw the motion paths they want their visuals to follow, creating a more intuitive and creative process.
How Does It Work?
Let’s break it down:
1. Start with an Image
In this example, we’ll use a tiny monster image generated in Midjourney. Make sure you are using Kling 1.0.
2. Select the Motion Brush
Using Kling’s interface, pick the first brush to define the element you want to animate.
3. Draw the Motion
Now comes the fun part. Draw the motion you want to see directly onto the canvas. For instance, sketching a simple up-and-down trajectory for the monster’s movement.
4. Watch the Result
Kling brings your drawing to life by translating your input into smooth, dynamic video.
By letting users manually direct motion, Kling enhances the flexibility and precision of video editing in a way that feels both approachable and advanced.
Thanks for reading!
Hi👋 I’m Erik Knobl. I talk about Generative AI on X/Twitter, and I‘m sharing my learnings in this newsletter. It would be amazing if you could join me on this journey.


