How to use Midjourney: Ultimate guide for beginners
Dive into the world of AI art with this comprehensive beginner’s guide to mastering Midjourney.
Dive into the world of AI art with this comprehensive beginner’s guide to mastering Midjourney.
Have you been captivated by the Generative AI wave? If so, you’ve landed in the right place! Let’s explore the fascinating world of Midjourney.
This step-by-step tutorial will walk you through the process of getting started with the Midjourney Discord server while honing your skills in prompt engineering best practices.
First things first: What is Midjourney?
Midjourney Inc. is an independent research lab based in San Francisco, pioneers an incredible new AI image generator powered by Artificial Intelligence, masterminded by David Holz. Acquiring the skill to use this AI tool and unlock its AI art generation capabilities is a powerful asset for digital artists, whether you’re an aspiring creator or a seasoned designer.
This tutorial serves as your gateway into the realm of AI image generation, utilizing it to transform natural language descriptions, or prompts, into captivating visuals. Simply provide a description of an image, and watch the tool work its magic, delivering astonishing AI art.
Yes. It’s like magic.
So, let’s start! If you want to learn the basics of this tool, you’re in luck. I’ve got you covered with the most comprehensive guide to kickstart your journey. We’ll cover all the essential steps to get started with Midjourney, including:
Basic Steps: How to use the Discord Bot, Parameters
Advanced Steps: Basic Commands, Prompt Engineering Basics, setting your own server
Basic steps to get started
Step 1. Join the Midjourney Channel on Discord
Midjourney distinguishes itself from other AI platforms such as Adobe Firefly and DALL-E due to its seamless integration with Discord. Whether you are familiar or unfamiliar with Discord, take the plunge, adjusting to the platform is well worth the effort. Simply go to http://discord.gg/midjourney to delve into the rabbit hole of creative possibilities.
Warning: You will need to subscribe to a plan in order to start generating images. In order to do so:
Visit Midjourney.com/account.
Sign in using your verified Discord account.
Choose a Midjourney subscription plan that suits your needs. I’d suggest you start with the basic plan to give it a try.
Step 2. Join the #Newbies
Once you are all set in the MidJourney channel, look for any #newbies channels on the side panel. There are different newcomer rooms and you can view all the artworks created by the users including yours. There is no difference between them, pick one and jump in.
Step 3. Start creating images
Now you need to interact with the Midjourney Bot to create awesome images of any art style. To do that, you will need to input a prompt: start by typing the command /imagine:
Now you are good to go: Just drop some words that describe the image you’re after, you can type a general description or be more specific adding styles and details. Send your prompt and wait for the result.
Crafting prompts is a new skill, and everyone is learning how to do it. So don’t worry about making them perfect. Experience will make you better.
Step 4. Edit your Images (Upscale and/or Make Variations)
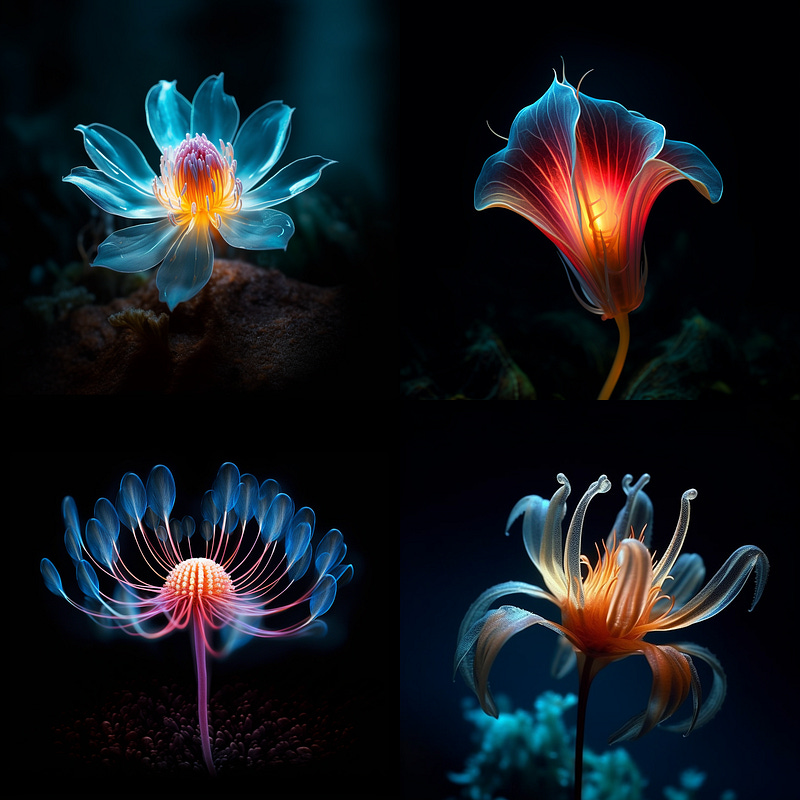
After that, the AI art generator will generate four options for you to explore and edit. Take a look at the following example for a realistic image:
Example: Award-winning photography of highly magical flower, minimalistic alien unusual design, bioluminescent, glowing.
You will notice a strange set of two rows of buttons visible below your generated image. They are there to provide you more control over your images.
First: The numbers 1–4 represent images coming from the top left clockwise.
Second: The letter U and V are different commands:
U buttons: Upscale the size of the image.
V buttons: Make variations of the image.
Third: The 🔄 icon reruns the job done. It re-rolls it and you’ll get a whole new set of images.
Step 5: More editing options
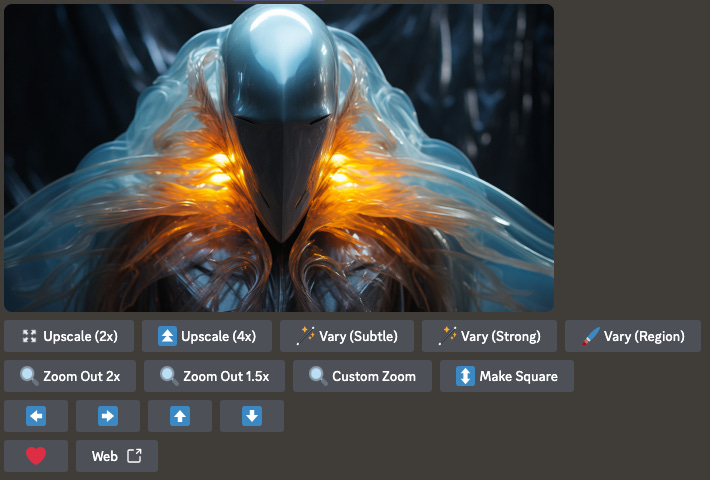
Once you upscale an AI generated art, you will unlock a set of new different options for more variations and expanding your image:
Example: Award-winning dynamic photograph of faceless ethereal alien being wearing all glowing, luminescent winged suit structure sculpture features, futuristic, abstract, modern, sci-fi background
Wowza! A lot of options. Let’s take a quick view of each one:
Both Upscalers (2x & 4x) will improve the resolution of your Midjourney image, depending on your needs. This is important if you have an actual use for it, like printing it.
Vary ( Strong & Subtle) will create a stronger or subtle variation of your selected image, this will generate a new grid of four options, based on the original image.
Vary (Region) will open two options for you to select an area in your image: rectangular or freehand. Drag to select the area you want to modify. Changes made by Midjourney will affect only this space.
Zoom Out (2x & 1.5) will broaden the perspective of any image. The newly expanded canvas will be filled-in using guidance from the prompt and the original image.
Custom Zoom allows you to change the prompt before you expand your image, giving you finer control over the finished AI generated image.
Panning (⬅️ ➡️ ⬆️ ⬇️) will extend your AI creation in the selected direction, adding new details as required.
Favorite will tag the images to easily find them on your Midjourney website.
Finally, Web will open the image in your gallery on Midjourney.com
Step 6: Save Your Creation
Done! Clicking on the image will open it and then you can just right-click to save it. For mobile, just long tap the image until you see a download icon in the top right corner. And that’s it.
Always learn what other are doing. Steal prompts, and modify them. Experiment. Free your imaginative power!
Advanced Steps
Prompt Engineering
Now that you are all set, let’s take a look at how prompts work: We know a Midjourney prompt is a text phrase that the Bot interprets to produce an AI image. It can be a simple word, a sentence, or an emoji. It can be a made-up word, even. The Bot will interpret it into an image (this is a very fun exercise, you should try it. My current favorite is “planthrocene”).
As you can see, there are infinite possibilities for prompt. So there are a few decisions you need to make in order to start refining your commands. One of the simplest ways to use the AI generator is with a technique known as additive prompting. It’s a simple way of writing a structured prompt, and it involves creating specific sections in your text prompt.
The following is a simple breakdown of a prompt that you can use as an example:
[Subject] + [Place] + [Style]
You need at least two sections to your prompt or more to make it work. You can add as many sections as you like; just ensure to separate them so you know what each part is doing once you start changing things around.
Here’s a more complex example of a prompt structure with tags you can add as you feel like it:
[Medium] + [Subject] + [Camera Angle] + [Style] + [Place] + [Focal Point] + [Textures] + [Amount of Detail] + [Color Palette] + [Lights] + [Time of Day] + [Mood] + [References]
Note: Remember that more words do not translate into more detailed results, as each word added reduces the importance of the rest. Also, the closest a word is to the start, the more weight it will have.
Let’s start with a simple structure:
[MEDIUM] of [SUBJECT] in [COLOR+LOCATION], [STYLE], [LIGHT]
And here are a few examples we can use:
Example: Photography of supermodel with minimalistic dress in a studio, in the style of high fashion geometrical photos, cinematic light
From here, you can add and/or modify the original prompt to get better images. Some options are: [color] tones, [position of the model], change to male model, etc. Let’s see another example:
Example: Illustration of rampaging tiger in a city, in the style of artist Jim Lee, dramatic light
Again, multiple options are open for further exploration: Perhaps we want to see all in yellow tones, or want to add more details to its actions like — hunting a prey. The sky is the limit.
Parameters
These are specific options added to a prompt that change how an image generates. Usually added at the end of all prompts, you need to use the following structure:
—[parameter] [value]
The most important ones are the following:
--aspect, or --ar Change the aspect ratio of your image. If you want your image to be vertical, for example, type --ar 9:16, this will make the width of your image 9 units, and 16 units for the height.
--chaos <number 0–100> How different you want your results to be? If you want them to be as uniform as possible, don’t use it, since the default Chaos value is 0. For more unusual and unexpected generations, increase the value as needed.
--stylize <number>, or --s <number> parameter influences how strongly Midjourney's default aesthetic style is applied to Jobs. The default value used is 100. If you want to increase it, apply this parameter.
--weird <number 0–3000>, or --w <number 0–3000> Explore unusual aesthetics with the experimental --weird parameter.
Model Version Parameters
Midjourney routinely releases new model versions to improve efficiency, coherency, and quality. Different models excel at different types of images.
--version <1, 2, 3, 4, 5.0, 5.1, 5.2, or 6> or --v <1, 2, 3, 4, 5.0, 5.1, 5.2, or 6> The current default is version 5.2, while Midjourney v6 is in alpha stage (some regular features are not yet available for it).
--niji <4, or 5> If you want to create anime-style images, use it (start with niji 5, it’s awesome). You can also apply it to photographs and see how both styles interact. If you apply it to your image, there is an additional parameter available for further stylization:
Style--style <expressive, original, or scenic> There are three options available to explore Niji 5 (original is the default). Take the time to explore them.
Uff. Are you still there? We are almost finishing.
A brief list of basic commands
If you are feeling like you are ready for the next level, I would suggest you move to the #general channels. There are more advanced ideas in those places from multiple AI artists. Also, start experimenting with the following commands:
/describe: Will generate 4 prompts based on an uploaded image. If you see an image you like, use describe to see how Midjourney will translate it. You won’t be able to actually replicate it (not yet), but it’s a good way to learn new words for your prompts.
/remix: Toggle Remix mode. Utilize Remix Mode to modify prompts, parameters, model versions, or aspect ratios across variations, panning and zooming.
/shorten: Analyze a prompt and return shorter prompts. This will help remove all the words Midjourney is not taking into account.
/info: Show information about your account and usage.
Setup your own Discord server
Finally, If you are getting serious about using Midjourney (and if you are reading this, you certainly are!), you may want to set up your own server to be able to organize your images, and be able to find them fast.
To do it, just click the “+” sign on the bottom left side to add a new server, name it, and then head back to the Midjourney server:
Click on the Midjourney Bot
Select “Add App”
In the option “Add to Server”, select your server.
Authorize the access to the Bot.
And that would be most of the basic stuff!
Thanks for reading!
Hi👋 I’m Erik, a product designer by day, and AI educator by night.
I‘m sharing my learnings in this newsletter.
It would be amazing if you could join me on this journey.


