Hello Directors.
On the first week of the Challenge, we built our foundation: a Character, a Setting, and an Establishing Shot.
But a single shot isn’t a movie. A movie is a sequence.
The hardest part of AI video creation isn’t generating a beautiful image; it’s keeping that beauty consistent from shot to shot. We’ve all seen AI videos where the character changes clothes every 3 seconds or the lighting jumps from day to night.
In this week’s video, I break down the exact workflow I use to fix this. I call it The “Last Frame” Rule.
Two weeks ago, we kicked off the Zero to Director Challenge. The goal is to build an AI video together, step-by-step.
This is an evergreen challenge, so you can join at any time.
This week, we’re tackling Challenge 2: Continuity Shots + Editing.
The Golden Rule of Continuity
If you only take one thing from this week’s lesson, let it be this: Always use the last frame of your previous shot to drive your next one.
This is the “anchor” that keeps your reality stable.
Before you generate your next shot, go to your Establishing Shot (or the previous clip), find the very last frame, and save it as an image. This image is your most valuable asset.
Here are the two methods I use to turn that single image into a smooth sequence.
Method 1: The Multishot Technique
I use this method when I want the AI to act as my cinematographer and handle the cuts for me. It works best in tools that allow Reference Images or Ingredients (like Veo 3.1).
The Recipe:
Upload Reference 1: Your Last Frame (for location context and continuity).
Upload Reference 2: Your Character Portrait (if you are doing close ups).
Upload Reference 3: The object they interact with (e.g., the robot).
The Prompt Structure: Instead of asking for one action, ask for a sequence separated by [cut].
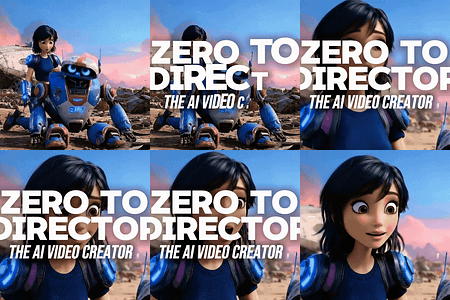
Woman walking in a junkyard of robotic pieces
[cut] close up to the surprised face of the woman
[cut] side view of a woman walking and stopping as she discovers a broken robot lying on the ground with a ton of metallic junk
Why it works: The AI understands that all three cuts belong to the same continuous reality because they share the same reference ingredients.
Method 2: The Frame-to-Frame Technique
Use this when you need precise movement, like a character walking from Point A to Point B, and you don’t want the AI to hallucinate random actions.
The Workflow:
Start Frame: Upload your Last Frame.
End Frame: Generate a new image of your character in the final position you want. (I use Gemini 2.5 Flash / Nano Banana to place my character asset into my setting background).
Generate: The video tool acts as a bridge, animating the pixels to get from your start frame to your end frame.
This creates an invisible cut where your character moves exactly how you planned.
✂️ The Final Step: Assembly
Once you have your clips, don’t just leave them in your generation folder. Drag them into an editor (I use CapCut for quick social edits).
When you place your Last Frame generated clip right next to your original clip, the transition should be seamless. The eye won’t detect the cut because the pixels are identical.
Your Mission for the Week: Try one of these methods. Take your shot from Week 1, extract the last frame, and generate a 3-second follow-up shot.
Paid Subscribers: Post your results in the Chat. I want to see your transitions!
Free Subscribers: Post your results on Notes and tag me.
Let’s make it flow.


